
Wondering how to retouch photos? Or the best ways to utilise Photoshop? We’ve got you covered. Learn more about the history of Photoshop, how to use Photoshop and our 5 quick wins on retouching images from our detailed guide.
Brief history of Photoshop
Back in 1987, Thomas Knoll, while studying at the University of Michigan, began writing a computer program capable of displaying greyscale images. This caught the eye of brother John, who suggested further development to create a full image editing application. Naming the project ImagePro, before changing (due to licencing issues) to Photoshop, the brothers secured a short-term deal with scanner manufacturer Barneyscan, and around 200 copies of Photoshop hit the shops.
John pitched Photoshop to engineers at both Adobe and Apple, with Adobe purchasing the distribution rights in September 1988. Eighteen months later, Photoshop 1.0 was released and very quickly established itself as the industry standard in digital colour editing, and the world of photography and advertising changed forever.
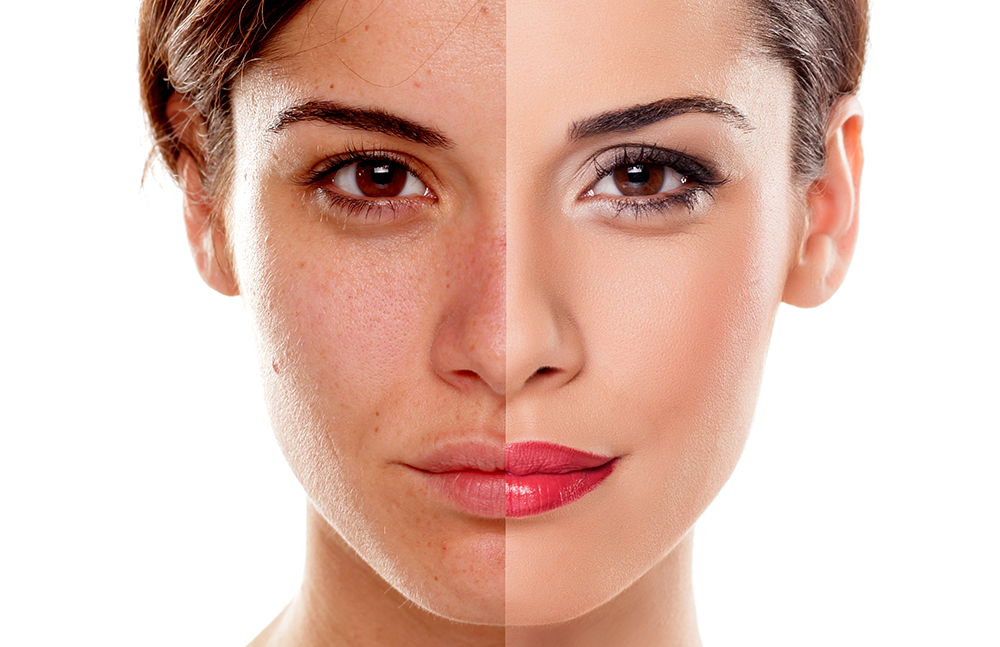
Now, some 30+ years on, Photoshop is all around us; our desktops, smartphones, across social media and print literature to the point that we are so used to images being edited and modified that when we do see untouched images of celebrities, they surprise us – and can soon go viral, leading to many online discussions. Whether these comments are positive or negative, the ethics of levels of image editing continue to raise debate, none more so than in the fashion industry. The creation of unattainable levels of beauty in imagery, through skin-smoothing, waist-shrinking, cheekbone-raising, neck and leg lengthening, has long been deemed problematic by health organisations the world over. The industry has started to acknowledge this, with several publications and companies now featuring no re-touched imagery at all.
However, there are no strict guidelines or rules elsewhere as to what constitutes too much digital enhancement, although last year, 20% of all entries to the World Press Photo competition, a prestigious photojournalism contest, were eliminated due to the extent of editing.
But what determines too much editing?
All advertisers want their product to stand out from the crowd, and with no clear regulations in place, the onus of enhancing how a product or service is portrayed falls mainly on the Photoshop user. Images for publication should never be deceptive or untrue. As with making false claims through text, displaying images beyond their real-life capabilities is a no-no, and can potentially lead down a path of ramifications that no-one wishes to follow.
Blatantly ‘photoshopped’ images can be more damaging than beneficial, but in general, enhancing colours, airbrushing blemishes, considerate sharpening of images is deemed fair, as long as the resulting image displays a product in a realistic, and achievable light, everyone’s happy.
How to use Photoshop effectively
When wondering how to utilise Photoshop effectively, there are 5 basic areas to look at:
- Cropping
- Sharpness
- Brightness/contrast
- Levels
- Saturation.
For best results, these should be applied in the running order below.

1. Cropping
Cropping can ultimately define how impactful an image will be. It defines the focus of the picture. The initial ‘crop’ of any image is done through the viewfinder; with the photographer taking time to frame and capture exactly what is intended for final purpose. This obviously can’t be the case for all types of photography; sports, animals, children, for example can’t be posed as with product photography. In these instances, cropping is used to eliminate any areas that upset the image visually, or when the subject is confined to a small portion of the image, to create focus.

2. Sharpness
Sharpness is key for any quality image. With all imagery, the better the original, the less work required to achieve optimum results. And while images can be sharpened using Photoshop, there are limits. An original out of focus image will never appear pin sharp, but we can improve it. Essentially, when sharpening, Photoshop defines the edges of the objects. Any over adjustment will result in the image displaying too much definition and boldness, and ultimately reducing the overall quality. Knowing how to sharpen an image is good, knowing when to stop sharpening is better.

3. Brightness/contrast
Photoshop bread and butter; the Brightness/contrast menu has an excellent ‘Auto’ feature that will give the image a much better overall balance. However, depending on the nature of the image this should always be adjusted manually too, just to ensure the best possible result.

4. Levels
As with the sharpening feature, this feature relies heavily on the user’s eyes. While again an excellent ‘Auto’ feature is available, finite manual adjustment will achieve best results. The three pointers allow for adjustments to be made to the dark, mid and light colours independently, giving the ability to fix any exposure issues in the image. Again though, over adjusting can deter from the quality of the image.

5. Saturation / Vibrance
And finally, Saturation and Vibrance; two very simple but effective sliders to really add vividness, sharpness and intensity to the colours of the image. Simple tools, but need to be used with consideration to the overall look of the subject. Increasing the vibrancy of an image often improves it, but getting the saturation right can take a little more practice as over saturated images can soon appear low quality. In many instances, however, decreasing the saturation just a little allows for an increase in the vibrancy and ultimately a better image. These tools can also be used in the opposite direction; decreasing the saturation and vibrancy gives a more grungy, gritty image.

So, there you have it. A very brief overview of how to use Photoshop. There are, of course, countless other filters, adjustments and tools used in the creation of high-end digital imagery. So to see how your product or business can be enhanced by the Photoshop magic, get in touch with a member of our helpful team now. Alternatively, find out more about our Creative services today here at M3.Agency.


